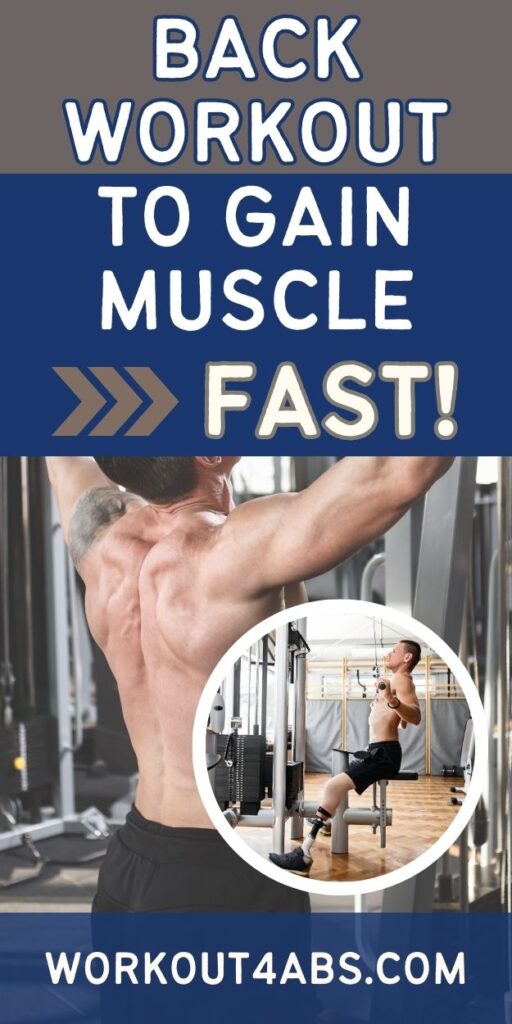
Are you looking for a back workout for mass? Building a strong and muscular back is a goal for many, especially for skinny individuals aiming to add size and definition. In this back workout, we’ll focus on key exercises designed to help skinny guys pack on muscle and develop a powerful and impressive back. Let’s get started!
Back Workout to Gain Muscle (SKINNY GUYS!)
If you enjoyed these tips, please save this pin to your Pinterest Board.
Always Deadlift on Pulling Days
Deadlifting on your pulling days can indeed be a beneficial addition to your workout routine, but it’s important to consider the context and individual factors when making this decision. Here are some reasons why deadlifts are often included on pulling days:
- Comprehensive Muscle Engagement: Deadlifts are a compound exercise that targets a wide range of muscles, including the lower back, glutes, hamstrings, quadriceps, and various muscles in the upper body such as the traps, lats, and forearms. This comprehensive muscle engagement makes deadlifts an efficient way to work multiple muscle groups simultaneously.
- Strengthens the Lower Back: Deadlifting places a significant emphasis on the lower back muscles, particularly the erector spinae, which play a crucial role in maintaining a strong and stable lower back. Strengthening these muscles can help reduce the risk of lower back injuries and improve overall spinal health.
- Posture Improvement: Deadlifts can contribute to better posture by strengthening the muscles responsible for spinal extension and stabilization. A strong lower back and core can assist in maintaining an upright posture, which is important for overall spinal health and reducing the risk of developing poor posture-related issues.
- Functional Strength: Deadlifts are considered a functional exercise because they mimic real-life movements like lifting heavy objects from the ground. This can help improve your ability to perform everyday activities with greater ease and reduced risk of injury.
- Increased Metabolism and Fat Loss: Deadlifts are a demanding exercise that requires a lot of energy. Performing deadlifts on your pulling days can help boost your metabolism, burn calories, and contribute to fat loss if combined with a well-balanced diet.
However, it’s essential to remember that not everyone should incorporate deadlifts into their routine, and it’s crucial to consider individual factors:
- Technique: Proper deadlift form is critical to avoid injury. Beginners should seek guidance from a qualified trainer to ensure they’re performing deadlifts correctly.
- Physical Condition: Individuals with certain medical conditions, injuries, or mobility issues may need to avoid or modify deadlifts to prevent exacerbating their conditions.
- Recovery: Deadlifts are a physically taxing exercise, and overtraining or performing them too frequently can lead to fatigue and potential injuries. Adequate rest and recovery between deadlift sessions are essential.
- Individual Goals: Deadlifts may not align with everyone’s fitness goals. If your primary objective is not strength or muscle building, you might choose other exercises that better suit your needs.
In conclusion, deadlifts can be an excellent addition to your pulling days if performed with proper technique and tailored to your individual fitness level and goals. They offer a wide range of benefits, including improved lower back strength and posture, but it’s essential to assess your specific circumstances and consult with a fitness professional if you have any concerns or questions about incorporating deadlifts into your routine.
If you enjoyed these tips, please save this pin to your Pinterest Board.

Seated Cable Row
The seated cable row is a compound exercise that primarily targets the muscles of the upper back, including the latissimus dorsi (lats), rhomboids, and trapezius muscles. When performed correctly, it can indeed provide a good stretch to the lats and engage the rear deltoids. Here’s how the exercise allows you to achieve a stretch in the lats and work the rear deltoids:
- Seated Position: When you perform the seated cable row, you sit down with your legs extended and your feet placed against a platform. This position stabilizes your lower body and allows you to isolate the upper body muscles, including the lats and rear deltoids.
- Grip and Arm Position: You typically hold the handle or bar attachment with an overhand grip. As you initiate the rowing motion, your arms are fully extended, and your shoulders are protracted (moved forward). This initial position allows for a good stretch in the latissimus dorsi muscles, which run down the sides of your back.
- Pulling Motion: As you begin the rowing movement, you pull the handle or bar towards your torso. This action involves retracting your shoulder blades and squeezing your upper back muscles together. It’s during this phase of the exercise that you feel the engagement in your lats.
- Squeezing at the End: To maximize the stretch and engagement in your lats and rear deltoids, it’s essential to pull the handle or bar all the way to your lower ribcage or upper abdomen. At this point, you should feel a significant contraction in your lats and the rear part of your shoulders (rear deltoids).
- Controlled Eccentric Phase: After the squeeze, you slowly return the handle to the starting position with your arms fully extended, allowing for a controlled eccentric phase. During this phase, you may still feel a stretch in your lats as your arms move away from your torso.
- Repeat: You can perform multiple repetitions of the seated cable row to effectively target and stretch your lats and rear deltoids.
The key to getting a good stretch in the lats during the seated cable row is to ensure that you use a full range of motion and maintain proper form throughout the exercise. Additionally, using an appropriate weight that allows you to perform the exercise with control and good technique is essential for maximizing the stretch and minimizing the risk of injury.
In summary, the seated cable row is an effective exercise for targeting the lats and rear deltoids, primarily due to its seated position, the initial overhand grip, and the controlled pulling motion that stretches and contracts these muscle groups during the exercise.
Barbell Row
The barbell row is an effective exercise for strengthening the lower back, along with several other muscles in the upper body, such as the lats, rhomboids, and traps. Learning to hinge properly is indeed crucial when performing the barbell row to ensure you’re targeting the lower back effectively and safely. Here’s how the barbell row works the lower back and why learning to hinge is important for proper execution:
- Strengthening the Lower Back:
- The barbell row is a compound exercise that involves lifting a weighted barbell off the ground while maintaining a bent-over position.
- The lower back plays a significant role in stabilizing your spine during this exercise, especially when you’re in the bent-over position.
- As you lift the barbell off the ground and retract your shoulder blades, your lower back muscles, particularly the erector spinae, are engaged to support your spine and keep it in a neutral position.
- The resistance from the barbell, gravity, and the effort required to maintain your back’s position create a strong stimulus for strengthening the lower back muscles.
- Importance of Learning to Hinge:
- Hinging is a fundamental movement pattern where you bend at your hips while maintaining a neutral spine. Learning to hinge properly is crucial for performing the barbell row safely and effectively.
- When you hinge correctly, you minimize the stress on your lower back and reduce the risk of injury. Instead of relying on excessive lower back flexion (rounding) or bending at the waist, you primarily use your hips to initiate the movement.
- Hinging properly involves pushing your hips back while keeping your chest up and maintaining a slight bend in your knees. This allows you to reach the barbell with your torso in a bent-over position, without compromising the integrity of your lower back.
- Engaging your hip hinge not only protects your lower back but also helps you maintain balance and generate power from the hips and legs, making the exercise more efficient.
Tips for Proper Barbell Row Form:
- Stand with your feet hip-width apart and the barbell in front of you.
- Bend at your hips to initiate the hinge, keeping your back flat and chest up.
- Maintain a slight bend in your knees to avoid locking them out.
- Grasp the barbell with an overhand grip, keeping your hands slightly wider than shoulder-width apart.
- Pull the barbell towards your lower ribcage while keeping your back straight.
- Squeeze your shoulder blades together at the top of the movement.
- Lower the barbell back to the starting position while maintaining the hinge.
By mastering the hinge movement and performing the barbell row with proper form, you can effectively strengthen your lower back while minimizing the risk of injury and maximizing the benefits of this compound exercise. It’s essential to start with a manageable weight and gradually increase it as your strength and technique improve. If you’re new to barbell rows, consider seeking guidance from a qualified trainer to ensure you’re performing the exercise safely and effectively.
Farmers Walks
The farmer’s walk is a simple yet highly effective functional strength exercise that targets various muscle groups, primarily the grip, forearms, traps, and the entire core. It involves walking while carrying heavy weights in both hands, simulating the action of carrying heavy objects. Here’s how to do the farmer’s walk:
Equipment Needed:
- Dumbbells, kettlebells, or farmer’s walk handles (specialized equipment designed for this exercise).
- Adequate space, preferably a clear, level surface like a gym floor or a dedicated workout area.
Steps to Perform the Farmer’s Walk:
- Choose Your Weights:
- Start with a pair of dumbbells, kettlebells, or farmer’s walk handles. The weight you choose should challenge you but allow you to maintain proper form and walk with control.
- Make sure the weights are of equal weight, as you’ll be carrying one in each hand.
- Set Up:
- Stand between the weights with your feet hip-width apart.
- Keep your back straight, chest up, and shoulders pulled back to maintain proper posture.
- Grip the Weights:
- Bend at your hips and knees to lower your body and grab the weights with an overhand grip.
- Ensure that your hands are centered on the handles or dumbbells, and your fingers are wrapped securely around them.
- Lift the Weights:
- Engage your core muscles to stabilize your spine.
- Lift the weights off the ground by extending your hips and knees. Keep your back straight throughout the movement.
- Stand Tall:
- Once you’ve lifted the weights, stand up fully, keeping your chest up and shoulders back.
- Avoid leaning forward or rounding your back; maintain an upright posture.
- Walk:
- Begin walking in a controlled manner, taking small steps.
- Keep your core engaged and your posture upright.
- Take care not to swing the weights or use momentum; the goal is to control the load.
- Walk for a predetermined distance or time, or until you reach muscle fatigue or grip failure.
- Turn and Return:
- When you reach the end of your walking path or reach your desired distance, carefully turn around without twisting your spine.
- Continue walking back to your starting point with the same controlled form.
- Lower the Weights:
- Once you’ve returned to the starting position, lower the weights to the ground with control.
- Bend at your hips and knees while keeping your back straight, gently placing the weights down.
- Rest and Repeat:
- Take a brief rest between sets if needed.
- Perform multiple sets of the farmer’s walk based on your fitness level and goals.
Tips:
- Start with lighter weights and gradually increase the load as your strength improves.
- Maintain proper posture throughout the exercise to minimize the risk of injury.
- Keep your breathing steady; inhale through your nose and exhale through your mouth.
- You can perform the farmer’s walk for time or distance, depending on your goals.
The farmer’s walk is an excellent exercise for developing grip strength, overall upper body strength, and core stability. It’s a versatile exercise that can be integrated into various workout routines to enhance functional strength and muscular endurance.
Plate Raise
The plate raise is an effective exercise for targeting the lower traps, which play a crucial role in maintaining good posture by helping to stabilize and retract the shoulder blades. Here’s how to perform the plate raise to work your lower traps and improve posture:
Equipment Needed:
- A weight plate (typically 5-10 pounds is suitable for beginners, but you can adjust the weight based on your strength and fitness level).
- A flat, stable surface to stand on.
Steps to Perform the Plate Raise:
- Starting Position:
- Begin by standing up straight with your feet shoulder-width apart.
- Hold a weight plate with both hands using an overhand grip. Your palms should be facing each other, and your thumbs should be on the top of the plate.
- Let your arms hang straight down in front of your body with the plate resting against your thighs.
- Maintain a neutral spine with your chest up and shoulders back. This is your starting position.
- Raising the Plate:
- Exhale and engage your core for stability.
- While keeping your arms straight, slowly lift the weight plate in front of you by raising it directly in line with your body.
- Continue raising the plate until your arms are parallel to the floor. This position is crucial for targeting the lower traps effectively.
- Focus on using your lower traps to lift the weight rather than your upper traps or shoulders. Imagine pulling your shoulder blades down and together as you raise the plate.
- Hold and Squeeze:
- Once your arms are parallel to the floor, hold this position for a brief pause.
- Focus on squeezing your lower traps and maintaining tension in that area.
- Lower the Plate:
- Inhale and slowly lower the weight plate back to the starting position, allowing it to touch your thighs gently.
- Maintain control throughout the lowering phase to work your muscles eccentrically.
- Repeat:
- Perform the plate raise for the desired number of repetitions. Aim for 3-4 sets of 10-15 reps to start, and adjust the weight and reps based on your fitness level.
Tips:
- Choose an appropriate weight that allows you to perform the exercise with proper form. You should feel a strong contraction in your lower traps during each repetition.
- Keep your movements controlled and avoid using momentum.
- Focus on maintaining good posture throughout the exercise. Avoid rounding your shoulders or arching your lower back.
- This exercise can be incorporated into your upper body or shoulder workout routine to specifically target the lower traps and improve posture.
Including the plate raise in your fitness routine can be beneficial for strengthening the lower traps and enhancing posture by promoting proper scapular alignment and shoulder stability.
Hyper Row
The hyper row is an exercise that primarily targets the muscles of the lower back, particularly the erector spinae, while also engaging the glutes and hamstrings to a certain extent. It is performed on a hyperextension bench or Roman chair. Here’s how to do a hyper row:
Equipment Needed:
- A hyperextension bench or Roman chair.
Steps to Perform the Hyper Row:
- Set Up:
- Adjust the hyperextension bench to your body size. The hip pad should be just below your hip bones, and the ankle pads should secure your feet.
- Step onto the foot platform of the bench, so your body is horizontal, and your hips are at the top of the pad.
- Your upper body should be hanging down towards the floor, and your legs should be secured under the ankle pads.
- Starting Position:
- Cross your arms over your chest and hold onto your shoulders or chest, or you can choose to hold a weight plate against your chest for added resistance if desired.
- Keep your feet together, or you can choose to separate them slightly for balance.
- The Rowing Motion:
- Begin the exercise by slowly lowering your upper body towards the floor. Keep your back straight and your core engaged as you hinge at your hips.
- Continue lowering until you feel a stretch in your lower back but maintain control throughout the movement. Do not overextend or force the stretch.
- Once you reach the bottom of the movement, initiate the rowing motion by using your lower back muscles to lift your upper body back up to the horizontal position. Squeeze your lower back at the top to engage the erector spinae.
- Maintain a controlled pace, avoiding any jerky movements or swinging.
- Repeat:
- Perform the hyper row for the desired number of repetitions. Start with 2-3 sets of 10-15 reps and adjust based on your fitness level and goals.
Tips:
- Focus on using your lower back muscles to lift your upper body during the rowing motion. Avoid using your arms to pull yourself up; they should remain crossed over your chest or holding a weight plate.
- Maintain a smooth, controlled range of motion throughout the exercise.
- Keep your head in a neutral position with your gaze forward, not looking up or down.
- Engage your core muscles to support your lower back and protect your spine.
- It’s essential to use proper form and avoid hyperextending or over-arching your lower back, which can lead to injury.
The hyper row is a valuable exercise for strengthening the lower back muscles and can be incorporated into your core or lower body workout routine. It’s essential to perform it with proper form to maximize its benefits while minimizing the risk of injury. If you’re new to this exercise, consider seeking guidance from a qualified fitness trainer to ensure you’re performing it correctly.
Pull Ups
Pull-ups are an excellent exercise for increasing the size and strength of your back muscles, particularly the latissimus dorsi (lats). Here’s how to do pull-ups effectively to target your back muscles for growth:
Equipment Needed:
- Pull-up bar or apparatus that allows you to hang and pull your body weight.
Steps to Perform Pull-ups for Back Muscle Size:
- Grip Placement:
- Stand in front of the pull-up bar and jump or step up to grip it with your palms facing away from you (pronated grip).
- Your hands should be slightly wider than shoulder-width apart. Adjust your grip width based on your comfort and shoulder mobility.
- Hang and Full Extension:
- Hang from the bar with your arms fully extended and your legs off the ground.
- Engage your core muscles to stabilize your body.
- Pulling Phase:
- Start the pull-up by retracting your shoulder blades and pulling your chest toward the bar.
- As you pull up, focus on driving your elbows down and back.
- Continue pulling until your chin is above the bar or your chest is close to the bar. Ensure that your chin clears the bar.
- Maintain a controlled and deliberate pace throughout the movement. Avoid jerking or using momentum to lift your body.
- Contraction and Squeeze:
- At the top of the pull-up, pause for a moment to feel the contraction in your back muscles, especially the lats.
- Squeeze your shoulder blades together to engage the back muscles fully.
- Lowering Phase:
- Slowly lower your body back to the starting position with your arms fully extended.
- Keep your body controlled and avoid swinging or dropping abruptly.
- Repeat:
- Perform the desired number of repetitions. Beginners can start with 3 sets of 5-8 reps and gradually increase the reps and sets as they become more comfortable and stronger.
Tips for Effective Pull-ups:
- If you’re new to pull-ups or find them challenging, you can use an assisted pull-up machine, resistance bands, or have a spotter assist you to reduce the amount of body weight you need to lift.
- Focus on maintaining proper form and range of motion throughout each repetition.
- Engage your core muscles to stabilize your body and prevent swinging.
- Use a controlled and deliberate tempo, emphasizing the squeeze at the top of the movement.
- Incorporate pull-ups into your back workout routine, ensuring you progressively increase the intensity and volume to promote muscle growth.
Remember that consistency, along with a well-balanced diet and adequate rest, is essential for muscle growth. Gradually increasing the resistance or difficulty of your pull-ups, such as by adding weight or using more advanced variations, can also help you continue to challenge your back muscles and promote size and strength gains.
If you enjoyed these tips, please save this pin to your Pinterest Board.
Home › Aesthetic Body Plan ›Back Workout for Mass