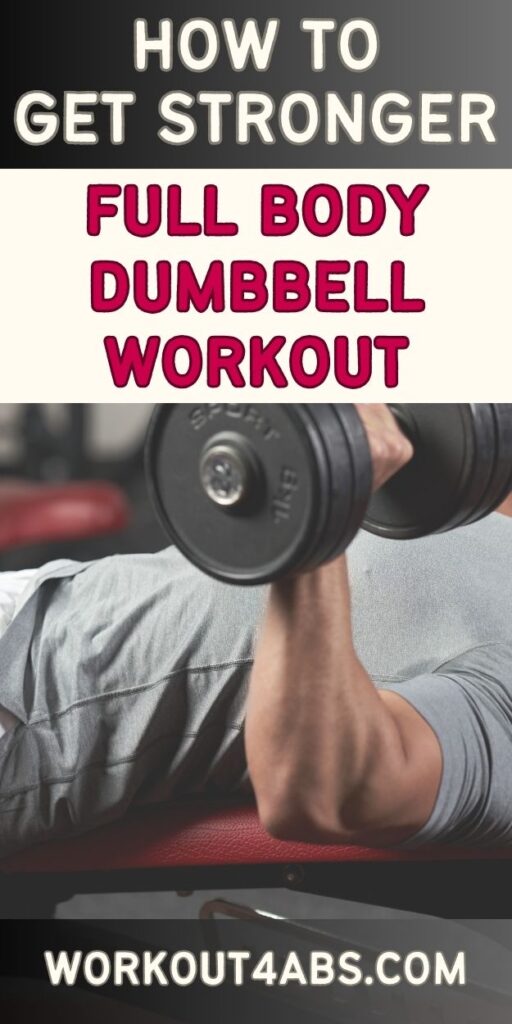
Full body workout for beginners for unlocking your full muscle-building potential. Here, we explore an efficient and effective full-body workout designed to increase muscle mass using just one versatile piece of equipment: dumbbells. Discover how to sculpt and strengthen your entire body from the comfort of your own home or gym.
The Ultimate Full Body Workout for Mass (DUMBBELLS ONLY)
If you enjoyed these tips, please save this pin to your Pinterest Board.
Train to Failure when Using Lighter Loads
Training to failure with lighter loads, such as when using dumbbells, can be an effective strategy for muscle growth, especially when targeting Type II muscle fibers. Here’s how it works:
- Muscle Fiber Types: Our muscles consist of different types of muscle fibers, primarily Type I (slow-twitch) and Type II (fast-twitch) fibers. Type II fibers have a greater potential for hypertrophy (muscle growth) compared to Type I fibers. To stimulate Type II fibers, you need to subject them to high levels of stress and fatigue.
- Training to Failure: Training to failure means performing an exercise until you can’t complete another repetition with proper form. When you reach failure, it indicates that your muscle fibers, particularly the Type II fibers, have been thoroughly recruited and fatigued.
- Lighter Loads and Muscle Failure: While heavier weights are typically associated with muscle failure, using lighter loads can still effectively reach failure, especially if you perform higher repetitions. The key is to choose a weight that allows you to reach failure within the desired rep range (typically 8-12 repetitions for hypertrophy).
- Volume and Fatigue: Lighter loads require more repetitions to achieve muscle failure, which increases the training volume (reps x sets). Higher volume workouts are effective for hypertrophy because they induce cumulative fatigue and stress on the muscles, ultimately leading to muscle growth.
- Variation and Muscle Confusion: Incorporating lighter loads and training to failure periodically can also provide variation in your workout routine. Muscle adaptation can occur if you consistently use the same weight and rep range. Switching things up with lighter loads can challenge your muscles in a different way, potentially promoting further growth.
- Safety and Form: When using lighter loads, there’s a reduced risk of injury compared to lifting heavy weights, which can be important for beginners or individuals with joint issues. It’s crucial to prioritize proper form when training to failure with lighter loads to minimize the risk of injury.
- Progressive Overload: Over time, you can increase the weight slightly as your muscles adapt to the lighter loads. This concept, known as progressive overload, is essential for continued muscle growth and strength development.
It’s important to note that while training to failure with lighter loads can be effective for hypertrophy, it may not be suitable for every workout or every individual. Periodization, or cycling between different training intensities and techniques, is often recommended to prevent overtraining and plateaus. Additionally, proper nutrition, rest, and recovery are essential components of a successful muscle-building program. Consult with a fitness professional or trainer to develop a well-rounded workout plan tailored to your goals and fitness level.
If you enjoyed these tips, please save this pin to your Pinterest Board.
Dumbbell Front Squats 4 Sets 10 Reps
Dumbbell front squats are an effective lower body exercise that targets the quadriceps, hamstrings, glutes, and core muscles. Here’s how to perform dumbbell front squats for 4 sets of 10 reps:
Equipment Needed:
- Dumbbells (Choose an appropriate weight for your fitness level)
- An exercise bench (optional, for stability)
Instructions:
- Set up:
- Begin by selecting the appropriate dumbbells. You can hold one dumbbell in each hand or use a single dumbbell held at your chest with both hands.
- Stand with your feet shoulder-width apart. Your toes should be pointing slightly outward.
- Dumbbell Placement:
- Hold the dumbbells at shoulder height with your palms facing forward. If using a single dumbbell, cradle it close to your chest with both hands.
- Squat Descent:
- Initiate the squat by pushing your hips back and bending your knees. Imagine sitting back into a chair.
- Lower your body down by bending your knees and hips simultaneously. Keep your chest up, back straight, and core engaged throughout the movement. Your elbows should point forward, and the dumbbells should remain close to your chest.
- Depth:
- Continue descending until your thighs are at least parallel to the ground or go slightly deeper if you can maintain proper form. Keep your knees in line with your toes, and avoid letting them collapse inward.
- Squat Ascent:
- Push through your heels and straighten your legs to return to the starting position. Exhale as you push up.
- Repetition:
- Perform 10 controlled repetitions, maintaining good form throughout. Focus on a controlled descent and powerful ascent.
- Sets:
- After completing one set of 10 reps, rest for a brief period (typically 1-2 minutes) before starting the next set.
- Complete 4 Sets:
- Repeat the entire sequence for a total of 4 sets of 10 reps each. Adjust the weight of the dumbbells as needed to challenge yourself while maintaining proper form.
Tips:
- Start with lighter weights to ensure you can perform the exercise with correct form. As you become more comfortable, gradually increase the weight.
- Keep your core engaged throughout the exercise to maintain stability and protect your lower back.
- Maintain a slow and controlled pace, especially during the descent, to maximize muscle engagement and reduce the risk of injury.
- If you have trouble with balance or mobility, you can perform this exercise while standing on a stable surface, such as an exercise bench or step, to limit the depth of the squat.
- Always consult with a fitness professional or trainer if you’re unsure about your form or technique, especially if you’re new to strength training exercises like dumbbell front squats.
Do Largest Muscle Groups First
Starting your workout with the largest muscle groups is a common practice in strength training and has several important advantages:
- Energy Levels: Larger muscle groups, such as the legs and back, require more energy and effort to train. By prioritizing these muscle groups at the beginning of your workout, you can tap into your energy reserves when you are at your freshest and have the most physical and mental energy. This allows you to lift heavier weights and perform exercises with better form, leading to more significant gains in strength and muscle size.
- Compound Exercises: Larger muscle groups are often targeted with compound exercises, which involve multiple joints and muscle groups working together. Compound movements, like squats, deadlifts, and bench presses, require a high level of coordination and engage multiple muscle groups simultaneously. By performing these exercises early in your workout, you can ensure that you’re at your best for the exercises that demand the most from your body.
- Hormonal Response: Training larger muscle groups triggers a more significant hormonal response. Exercises like squats and deadlifts, which target the legs and back, can lead to the release of growth hormone and testosterone. These hormones play a crucial role in muscle growth and overall fitness progress. Starting your workout with these exercises can maximize the hormonal response and contribute to better results.
- Injury Prevention: Fatigue can increase the risk of injury during a workout. By training the largest muscle groups first, you reduce the likelihood of fatigue compromising your form and technique during exercises. Proper form is essential for injury prevention and optimal muscle engagement.
- Mental Focus: Initiating your workout with compound exercises for larger muscle groups requires mental focus and concentration. This sets a positive tone for the rest of your session, ensuring that you’re mentally engaged and committed to your entire workout.
- Time Efficiency: Compound exercises for larger muscle groups tend to be time-efficient. By tackling these exercises at the beginning, you can complete the most significant portion of your workout efficiently. This can be particularly useful if you have limited time for your training session.
- Balanced Training: Prioritizing larger muscle groups helps ensure a balanced workout routine. Neglecting these muscle groups can lead to muscle imbalances, which may increase the risk of injury and hinder your overall progress. Starting with larger muscle groups ensures that you give them the attention they deserve.
While it’s generally advisable to start with larger muscle groups, it’s important to note that workout programming should be tailored to individual goals and preferences. Some people may choose to structure their workouts differently based on specific objectives, such as emphasizing certain muscle groups or improving endurance. Additionally, it’s essential to warm up properly before any workout, regardless of the muscle groups you plan to target first, to prepare your body for the demands of exercise and reduce the risk of injury.
Romanian Deadlift 3 Sets of 12 Reps
The Romanian Deadlift (RDL) is a compound exercise that targets the hamstrings, glutes, lower back, and upper back muscles. Here’s how to perform it for 3 sets of 12 reps:
Equipment Needed:
- Barbell or dumbbells
- Weight plates (if using a barbell)
- Weightlifting belt (optional, for additional lower back support)
Instructions:
- Setup:
- Begin by standing with your feet hip-width apart. If using a barbell, place it in front of you on the floor, and load it with an appropriate weight. If using dumbbells, hold one in each hand at your sides.
- Maintain a slight bend in your knees throughout the exercise.
- Grip:
- For a barbell RDL, bend at your hips and reach down to grip the barbell with a shoulder-width overhand grip (palms facing your body). Your hands should be just outside your thighs.
- For a dumbbell RDL, hold the dumbbells in front of your thighs with your palms facing your body.
- Positioning:
- Stand tall with your chest up, shoulders back, and your core engaged. Keep your back straight and maintain a neutral spine throughout the movement.
- Hip Hinge:
- Initiate the movement by pushing your hips back while maintaining a slight bend in your knees. Imagine pushing your hips behind you as if closing a car door with your rear end. Keep your back straight and your head in a neutral position.
- Lower the weights along the front of your legs, maintaining a close distance between the weights and your body. Continue to hinge at your hips until you feel a stretch in your hamstrings. Your torso should be nearly parallel to the ground.
- Stretch and Hold:
- At the bottom of the movement, you should feel a stretch in your hamstrings, but avoid rounding your back. Hold this position for a moment to emphasize the stretch and engage your hamstrings.
- Lift and Return:
- Push through your heels and engage your hamstrings and glutes to lift your torso back up to the starting position. Keep the weights close to your body as you rise.
- Squeeze your glutes at the top of the movement to fully engage your hip extensors.
- Repetitions:
- Perform 12 controlled repetitions, focusing on maintaining proper form throughout the exercise.
- Sets and Rest:
- Complete 3 sets of 12 reps each. Rest for 1-2 minutes between sets to allow for recovery.
Tips:
- Start with lighter weights to master the technique before increasing the load.
- Maintain a neutral spine and avoid rounding your back during the exercise to prevent injury.
- Keep your core engaged to provide stability to your lower back.
- Focus on the stretch in your hamstrings during the lowering phase.
- Breathe naturally throughout the exercise, exhaling as you lift the weights.
- If using a barbell, ensure it stays close to your body throughout the movement.
The Romanian Deadlift is a potent exercise for strengthening the posterior chain and improving hip hinge mechanics. It’s crucial to prioritize proper form and gradually increase the weight as you become more comfortable with the movement.
Dumbbell Rows 4 Sets 10 Reps
Dumbbell rows are an effective exercise for targeting the muscles of the upper back, including the latissimus dorsi (lats), rhomboids, and trapezius. Here’s how to perform dumbbell rows for 4 sets of 10 reps:
Equipment Needed:
- Dumbbells
- Weightlifting bench (optional)
- Exercise mat (optional)
Instructions:
- Set Up:
- Begin by selecting an appropriate dumbbell weight that challenges you without compromising your form. You’ll need one dumbbell for each hand.
- Place one dumbbell on each side of a weightlifting bench, if available. If you don’t have a bench, you can perform the exercise with your knee and hand supported on a flat surface, like a workout bench, bed, or exercise mat.
- Positioning:
- Stand facing the bench or the flat surface. If using a bench, place your right knee and right hand on the bench and keep your left foot on the ground.
- If you’re not using a bench, place your right knee and right hand on a flat surface while keeping your left foot on the ground.
- Your back should be flat, and your spine should be in a neutral position.
- Pick Up the Dumbbell:
- With your left hand, pick up the dumbbell from the floor or the side of the bench.
- Your left arm should be fully extended, hanging straight down, and your palm should be facing your body.
- Rowing Motion:
- Keeping your back flat and your core engaged, initiate the rowing motion by pulling the dumbbell towards your hip. Imagine squeezing your shoulder blade towards your spine as you pull.
- Your elbow should be close to your body as you lift the dumbbell. Your forearm should move up and back, keeping it close to your torso.
- Squeeze and Hold:
- At the top of the movement, squeeze your back muscles and hold for a brief moment to emphasize the contraction.
- Lower the Dumbbell:
- Slowly lower the dumbbell back to the starting position with your arm fully extended. Keep the movement controlled and avoid using momentum.
- Repetitions:
- Perform 10 controlled repetitions with your left arm before switching to your right arm.
- Sets and Rest:
- Complete 4 sets of 10 reps for each arm. Rest for about 1-2 minutes between sets to allow for recovery.
Tips:
- Maintain a neutral spine and avoid rounding or arching your back.
- Keep your core engaged throughout the exercise to provide stability to your lower back.
- Focus on the mind-muscle connection, emphasizing the contraction of your upper back muscles during the row.
- Choose a weight that allows you to complete each set with good form while still challenging your muscles.
- Exhale as you pull the dumbbell up and inhale as you lower it.
- Keep your neck in line with your spine and avoid looking up or down during the exercise to prevent strain.
Dumbbell rows are an excellent exercise for building upper back strength and improving posture. Ensure that you use proper form and control throughout the movement to maximize its effectiveness and minimize the risk of injury.
Floor Press 4 Sets 10 Reps
The floor press is a strength training exercise that primarily targets the chest, triceps, and shoulders. It’s similar to the bench press but performed on the floor. Here’s how to do the floor press for 4 sets of 10 reps:
Equipment Needed:
- Barbell or dumbbells
- Weight plates (if using a barbell)
- Exercise mat or soft surface (optional for comfort)
Instructions:
- Set Up:
- Begin by lying on your back on the floor or on an exercise mat. If you’re using a barbell, position it horizontally across your hips.
- If using dumbbells, hold one in each hand with your arms fully extended, so the dumbbells are above your chest.
- Leg Position:
- Bend your knees and place your feet flat on the floor. Your feet should be hip-width apart for stability.
- Grip and Hand Placement:
- If using a barbell, grip the bar with your hands slightly wider than shoulder-width apart. Your palms should face away from your body.
- If using dumbbells, your palms should also be facing away from your body.
- Lower the Weight:
- Slowly lower the barbell or dumbbells to your chest while keeping your elbows close to your body. Your upper arms should be parallel to the floor, and your forearms should be perpendicular to the floor.
- Lower the weight until your upper arms lightly touch the floor or come very close to it, ensuring a full range of motion.
- Pressing Motion:
- Exhale and push the weight back up to the starting position, extending your arms fully. Keep your core engaged and maintain a stable position throughout the movement.
- Repetitions:
- Perform 10 controlled repetitions of the floor press. Focus on a smooth and controlled motion, both during the descent and ascent of the weight.
- Sets and Rest:
- Complete 4 sets of 10 reps each. Rest for about 1-2 minutes between sets to allow for recovery.
Tips:
- Ensure that your back, shoulders, and head are in contact with the floor or exercise mat throughout the exercise.
- Keep your core engaged to maintain stability and protect your lower back.
- Use a weight that challenges you but allows you to complete each set with proper form.
- Pay attention to your grip width and hand placement, as it can affect the muscles targeted. A wider grip may emphasize the chest, while a narrower grip may target the triceps more.
- Focus on maintaining a controlled pace, especially during the lowering phase to prevent injury.
The floor press is a versatile exercise that can be an excellent addition to your upper body strength training routine, especially if you have limited equipment or are looking for a variation of the traditional bench press.
Standing Dumbbell Overhead Press 3 Sets 12 Reps
The Standing Dumbbell Overhead Press is a compound exercise that targets the shoulder muscles, specifically the anterior deltoid, medial deltoid, and trapezius, as well as the triceps. Here’s how to perform it:
Equipment Needed:
- Dumbbells
Instructions:
- Set Up:
- Start by selecting an appropriate pair of dumbbells that challenge you but allow you to maintain proper form.
- Stand with your feet hip-width apart on a stable surface, such as a weightlifting platform or the gym floor.
- Grip the Dumbbells:
- Hold one dumbbell in each hand at shoulder height with your palms facing forward. Your elbows should be bent at a 90-degree angle, creating a “goalpost” position. This is your starting position.
- Posture:
- Ensure you have a strong and stable posture. Your core should be engaged, your chest should be up, and your shoulders should be relaxed but pulled back and down.
- Pressing Motion:
- Begin the movement by pushing the dumbbells overhead. Extend your arms fully, but do not lock your elbows at the top to avoid unnecessary strain on the joint.
- As you press the dumbbells up, they should follow a vertical path, moving directly over your head. Avoid leaning backward or forward during the press; maintain a neutral spine and upright posture.
- Lockout Position:
- At the top of the press, the dumbbells should be directly over your head. Your biceps should be close to or slightly behind your ears, and your wrists should be straight. This is the lockout position.
- Lowering the Dumbbells:
- Slowly lower the dumbbells back to the starting position at shoulder height. Control the descent to work your muscles effectively and prevent injury.
- Repetitions:
- Perform the desired number of repetitions, typically in the range of 8-12 for hypertrophy or strength building.
- Sets and Rest:
- Complete the planned number of sets, usually 3-4 sets, resting for 1-2 minutes between sets to allow for recovery.
Tips:
- Maintain a stable and strong core throughout the exercise to provide a solid base for the overhead press.
- Keep your head in a neutral position, looking straight ahead or slightly upward, rather than tilting your head back.
- Avoid using excessive momentum or jerking movements. Focus on a controlled and smooth press.
- If you experience difficulty with stability, consider performing the exercise seated on a bench with back support.
- Choose an appropriate weight that allows you to complete your desired number of repetitions with proper form. As you progress, you can gradually increase the weight.
The Standing Dumbbell Overhead Press is an effective compound exercise for building shoulder strength and muscle. It also engages the triceps and helps improve shoulder stability. Incorporate this exercise into your upper body or full-body strength training routine for well-rounded shoulder development.
Dumbbell Curls 3 Sets 15 Reps
Dumbbell curls are a popular isolation exercise that primarily targets the biceps, helping to develop arm strength and muscle definition. Here’s how to perform dumbbell curls:
Equipment Needed:
- Dumbbells
Instructions:
- Choose the Right Dumbbells:
- Start by selecting an appropriate pair of dumbbells. The weight should be challenging but allow you to perform the exercise with proper form.
- Starting Position:
- Stand up straight with your feet hip-width apart. Hold a dumbbell in each hand at arm’s length by your sides, with your palms facing forward. This is your starting position.
- Initiate the Curl:
- Begin the movement by exhaling and bending your elbows to lift the dumbbells toward your shoulders. Keep your upper arms close to your torso, and your wrists should be in a neutral position (not bent).
- Focus on the Biceps:
- As you curl the dumbbells upward, focus on contracting your biceps. Squeeze your biceps at the top of the movement to maximize the muscle engagement.
- Full Range of Motion:
- Continue curling the dumbbells until they are at shoulder level or slightly higher. This completes one repetition and represents the top of the movement.
- Lower the Dumbbells:
- Inhale and slowly lower the dumbbells back to the starting position, extending your elbows fully. Control the descent to work your muscles effectively and avoid swinging or using momentum.
- Repetitions:
- Perform the desired number of repetitions. A common rep range for bicep curls is 8-12 repetitions per set for muscle growth and strength.
- Sets and Rest:
- Complete the planned number of sets, usually 3-4 sets, resting for about 1-2 minutes between sets to allow for recovery.
Tips:
- Maintain proper form throughout the exercise. Avoid using your shoulders, back, or hips to lift the weights; the movement should be isolated to the biceps.
- Keep your core engaged and your posture upright to prevent any swaying or leaning backward.
- Avoid swinging the dumbbells or using momentum to lift them. This can lead to ineffective muscle engagement and potential injury.
- Focus on a controlled and deliberate movement, both when lifting and lowering the dumbbells.
- It’s essential to use a weight that allows you to complete your desired number of repetitions with proper form. As you progress, you can gradually increase the weight.
- You can vary your grip by using a supinated (palms up), neutral (palms facing each other), or pronated (palms down) grip to target the biceps differently.
Dumbbell curls are a versatile exercise and can be included in your arm training routine to help build strength and improve the appearance of your biceps.
Dumbbell Overhead Extension 3 Sets 15 Reps
The Dumbbell Overhead Extension is an effective isolation exercise that primarily targets the triceps, helping to develop strength and muscle definition in the back of your upper arms. Here’s how to perform this exercise:
Equipment Needed:
- Dumbbell
- Weight bench (optional)
Instructions:
- Set Up:
- Begin by selecting an appropriate dumbbell that allows you to perform the exercise with proper form and challenges your triceps.
- You can perform this exercise while standing or seated on a weight bench. If using a bench, adjust the backrest to a 90-degree angle to provide back support during the exercise.
- Standing Position (optional):
- If you choose to perform this exercise while standing:
- Stand up straight with your feet shoulder-width apart.
- Hold the dumbbell with both hands using an overhand grip (palms facing up).
- Your grip should be slightly narrower than shoulder-width apart.
- If you choose to perform this exercise while standing:
- Seated Position (optional):
- If you prefer to perform the exercise seated on a bench:
- Sit on the bench with your back against the backrest.
- Hold the dumbbell with both hands using an overhand grip (palms facing up).
- If you prefer to perform the exercise seated on a bench:
- Lifting the Dumbbell:
- Lift the dumbbell overhead until your arms are fully extended, and the weight is directly above your head. Keep your elbows close to your ears.
- Lowering the Dumbbell:
- Inhale and slowly bend your elbows to lower the dumbbell behind your head. The movement should only occur at the elbows.
- Lower the dumbbell until your forearms are parallel to the ground or as far as your shoulder flexibility allows without discomfort. Your upper arms should remain stationary throughout the exercise.
- Extension:
- Exhale and extend your elbows to return the dumbbell to the overhead position. Focus on fully extending your arms and contracting your triceps at the top of the movement.
- Repetitions:
- Perform the desired number of repetitions, typically in the range of 8-12 reps per set for triceps development.
- Sets and Rest:
- Complete the planned number of sets, usually 3-4 sets, resting for about 1-2 minutes between sets to allow for recovery.
Tips:
- Maintain proper form throughout the exercise. Avoid leaning forward or backward, and keep your core engaged for stability.
- Use a controlled and deliberate movement when lowering and extending the dumbbell to engage the triceps effectively and avoid excessive strain on the elbow joint.
- It’s important to use an appropriate weight that challenges your triceps but allows you to complete your desired number of repetitions with proper form.
- If you experience discomfort or strain in your shoulders or elbows, adjust the range of motion by not lowering the dumbbell as far behind your head.
- Ensure a secure grip on the dumbbell to prevent accidental dropping during the exercise.
- If you’re performing the exercise seated on a bench, make sure the bench is stable and properly adjusted for your comfort.
The Dumbbell Overhead Extension is a valuable exercise for targeting the triceps and is commonly included in upper body strength and hypertrophy (muscle growth) routines.
If you enjoyed these tips, please save this pin to your Pinterest Board.
Home › Aesthetic Body Plan ›Full Body Workout for Beginners