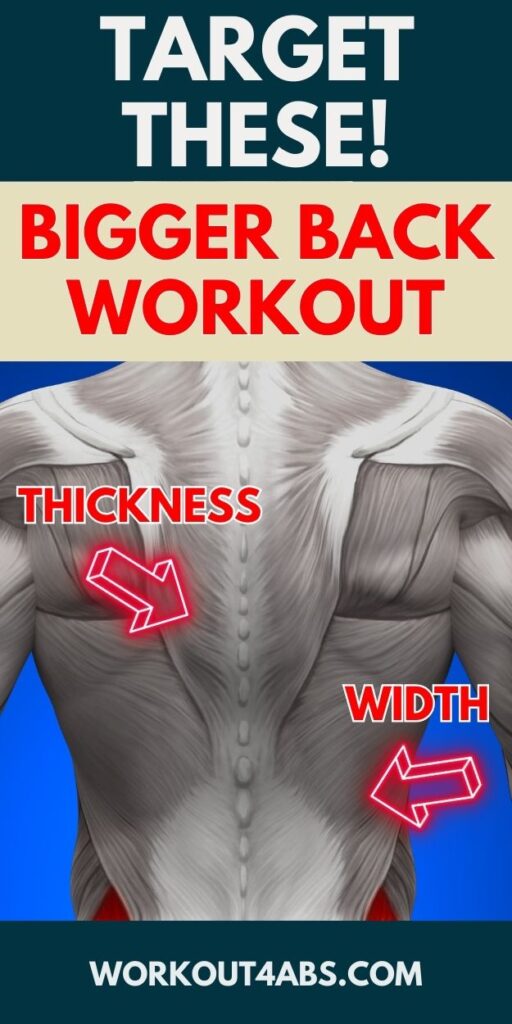
Upper back strength exercises for building a strong and well-defined upper back not only enhances your physique but also contributes to better posture and overall upper body strength. In this article, we’ll explore the most effective exercises that specifically target the mid and upper back muscles, helping you achieve a sculpted and powerful upper body.
Best Exercise For Upper Back Size and Strength
If you enjoyed these tips, please save this pin to your Pinterest Board.
(Penlay) Bent Over Row to Isolate the Upper and Mid Back
The Penlay row is a variation of the bent-over row exercise that emphasizes explosive power and strength development in the upper back, lats, and posterior deltoids. It’s typically performed with a barbell. Here’s how to do the Penlay row:
Equipment Needed:
- Barbell with weights
- Weightlifting platform or stable surface
Step-by-Step Instructions:
- Setup:
- Begin by setting up a barbell with weight plates. Use an overhand grip (palms facing you) with your hands spaced slightly wider than shoulder-width apart.
- Foot Position:
- Stand with your feet shoulder-width apart. The barbell should be positioned over the middle of your feet.
- Bend at the Hips and Knees:
- Hinge at your hips and slightly bend your knees to lower your torso. Keep your back straight and chest up, maintaining a neutral spine position. This is your starting position.
- Begin the Lift:
- While keeping your back flat and your core engaged, lift the barbell off the floor explosively. Imagine pulling the barbell towards your lower ribcage as you lift it.
- Barbell Position:
- As you lift, the barbell should come in contact with your lower ribcage or upper abdomen. Keep your elbows close to your body during the pull.
- Hold for a Second:
- At the top of the lift, briefly pause for a second to fully engage the muscles of your upper back and lats.
- Lower the Barbell:
- Lower the barbell back to the floor under control. Keep your back straight and maintain good form as you descend.
- Repeat:
- Complete the desired number of repetitions. For strength and power development, aim for 3-5 sets of 5-8 reps.
Tips:
- Maintain a strong, stable base by keeping your feet firmly planted on the floor throughout the exercise.
- Use proper breathing technique: Inhale as you lower the barbell and exhale as you lift it.
- Start with a weight that allows you to perform the exercise with proper form and control. Gradually increase the weight as you become more comfortable with the movement.
- The Penlay row is typically performed explosively, so focus on generating power and speed during the lift.
- This exercise can be challenging, so it’s essential to prioritize good form and gradually increase the weight to avoid injury.
The Penlay row is an excellent choice for those looking to improve their explosive pulling power and develop a strong upper back. Incorporate it into your strength training routine to see improvements in your back and overall strength.
If you enjoyed these tips, please save this pin to your Pinterest Board.
Prone Position on Bench – Chest Supported Rows
The prone row exercise, also known as the chest-supported row, is a great way to target the muscles of the upper back and improve posture. It involves lying face down on an incline bench while performing a rowing motion with dumbbells or a barbell. Here’s how to do it:
Equipment Needed:
- An incline bench
- Dumbbells or a barbell
- Weight plates (if using a barbell)
Step-by-Step Instructions:
- Setup:
- Adjust the incline bench to a comfortable angle, typically around 30 to 45 degrees. Ensure it’s stable and secure.
- Place a pair of dumbbells or load a barbell with an appropriate amount of weight plates for your fitness level.
- Body Positioning:
- Lie face down on the incline bench with your chest and stomach firmly against the pad. Your feet should be flat on the ground for stability.
- Hold the dumbbells or grip the barbell with an overhand grip (palms facing down) and your hands slightly wider than shoulder-width apart. Allow your arms to hang straight toward the floor.
- Initial Position:
- Begin the exercise with your arms fully extended and the weights hanging toward the floor. This is your starting position.
- Rowing Motion:
- Exhale and pull the weights toward your hips by bending your elbows and squeezing your shoulder blades together. Keep your elbows close to your body as you lift.
- Continue to lift until the dumbbells or barbell make contact with your lower ribcage or upper abdomen. At this point, your upper arms should be parallel to the floor.
- Hold and Squeeze:
- Hold the contracted position for a second or two, focusing on squeezing your back muscles to maximize the engagement.
- Lower the Weights:
- Inhale and extend your arms to return to the starting position in a controlled manner. Allow your shoulder blades to stretch at the bottom of the movement.
- Repeat:
- Complete the desired number of repetitions. Aim for 3-4 sets of 8-12 reps.
Tips:
- Keep your head in a neutral position, aligned with your spine, to avoid straining your neck.
- Maintain a flat back and engage your core muscles throughout the exercise to protect your lower back.
- Focus on the mind-muscle connection, concentrating on squeezing your upper back muscles during the rowing motion.
- Start with lighter weights to ensure you can perform the exercise with proper form. Gradually increase the weight as you become more comfortable with the movement.
- Control the weights on the way down to prevent any swinging or jerking motions.
The prone row exercise is an effective way to strengthen the upper back muscles, particularly the lats and rhomboids. It’s also a safer alternative to traditional bent-over rows for individuals with lower back issues as it provides support for the chest and minimizes strain on the lumbar spine.
Seated Row with Elbows Flaring Out
Performing a seated row with your elbows flaring out and staying up throughout the movement is a variation that can help target different muscles in the upper back and rear deltoids. This technique increases the range of motion and can lead to more muscular engagement. Since it places additional emphasis on specific muscles, you may need to perform more reps per set to achieve a sufficient workout stimulus. Here’s how to do it:
Equipment Needed:
- Seated row machine or cable row machine
- Appropriate weight/resistance setting
Step-by-Step Instructions:
- Machine Setup:
- Adjust the seat height and handle attachments on the seated row machine to suit your body size and preferences.
- Ensure the weight/resistance is set at an appropriate level for your strength and fitness level.
- Seated Position:
- Sit down on the rowing machine with your feet flat on the footrests or the ground.
- Grasp the handle attachments with an overhand grip (palms facing down) and your hands slightly wider than shoulder-width apart.
- Keep your back straight, chest up, and core engaged.
- Initial Position:
- Extend your arms fully, allowing your elbows to flare out and remain elevated, almost shoulder-height.
- Pulling Phase:
- Exhale and initiate the rowing motion by pulling the handle attachments toward your lower ribcage or upper abdomen. As you pull, keep your elbows flaring out to the sides, maintaining their elevated position.
- Squeeze your shoulder blades together at the end of the movement, emphasizing the upper back and rear deltoid engagement.
- Hold and Squeeze:
- At the fully contracted position, hold for a moment, emphasizing the squeeze in your upper back muscles and rear deltoids.
- Return to Initial Position:
- Inhale and extend your arms fully, returning to the initial position with your elbows flaring out and up.
- Repeat:
- Perform the desired number of repetitions, focusing on maintaining the form with elbows elevated and flaring out.
Tips:
- Ensure that you are using proper posture throughout the exercise. Keep your back straight, chest up, and core engaged to protect your spine.
- Focus on the mind-muscle connection, concentrating on feeling the contraction in your upper back and rear deltoids as you squeeze at the top of the movement.
- Start with a lighter weight/resistance to get accustomed to this variation and gradually increase it as needed.
- Due to the increased range of motion and muscle engagement, you may need to perform more repetitions (around 12-15 or more per set) compared to the traditional seated row to achieve a similar level of muscular fatigue.
- Remember to maintain control throughout the exercise and avoid using momentum or jerking motions.
Performing seated rows with elbows flaring out and staying elevated can be an effective way to target specific areas of the upper back and rear deltoids. It’s essential to prioritize good form and gradually increase the reps and resistance to challenge and stimulate these muscles effectively.
If you enjoyed these tips, please save this pin to your Pinterest Board.

Home › Gain Back Muscles ›Upper Back Strength Exercises