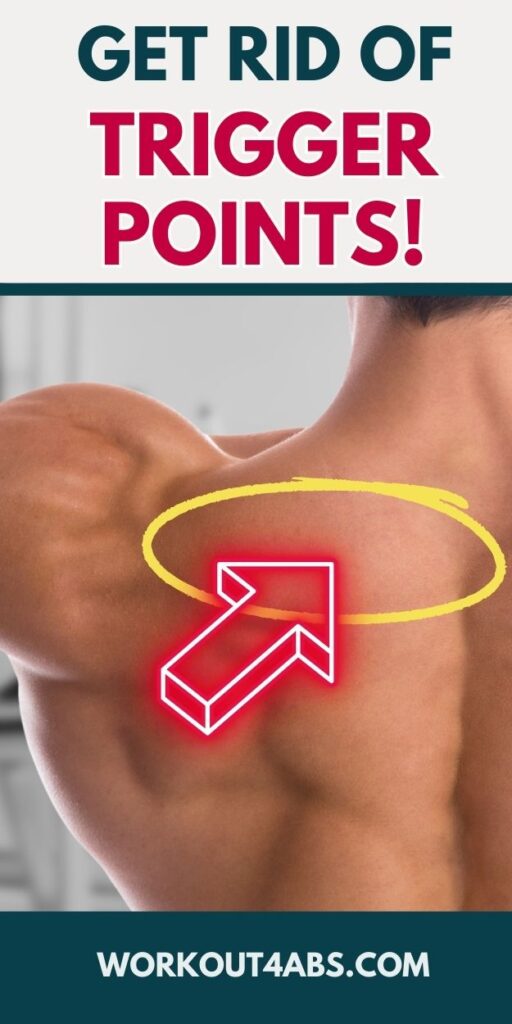
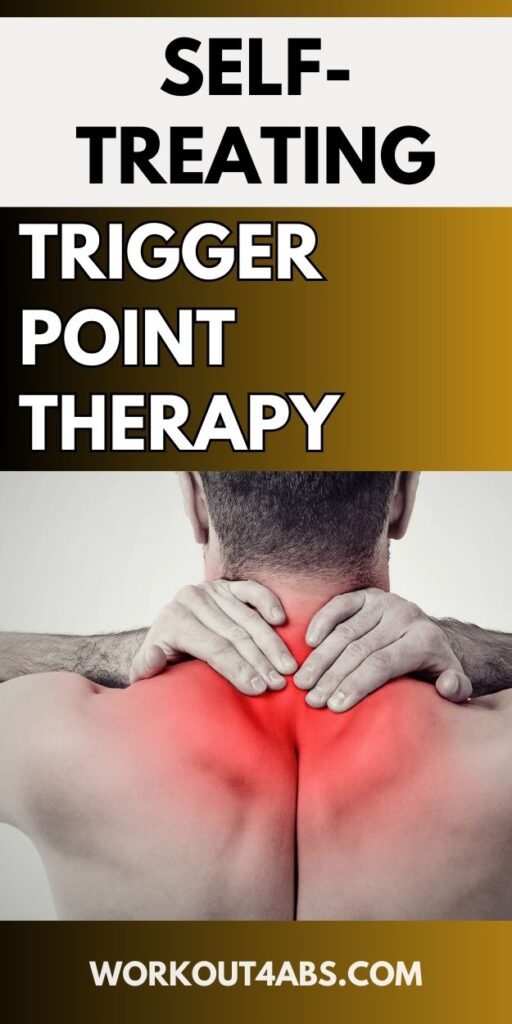
Are you looking get relief from upper trap knots? If you’ve ever experienced those stubborn knots in your trapezius muscles causing discomfort and tension, you’re not alone. In this article, we’ll explore a range of effective stretches and self-massage techniques that can offer much-needed relief to those knots in your upper back, helping you find comfort and relaxation.
60 Second Stretches to Get Knots from Shoulders, Upper Back, & Traps
If you enjoyed these tips, please save this pin to your Pinterest Board.
Chin Tucks and Neck Extensions
Chin tucks and neck extensions are simple exercises that can help relieve knots or tension in the trapezius muscles, which are located on the upper back and neck. These exercises can be done anywhere and don’t require any special equipment. Here’s how to perform chin tucks and neck extensions:
Chin Tucks:
- Sit or stand up straight: Start in a comfortable seated or standing position with your shoulders relaxed.
- Tuck your chin: Gently draw your chin towards your chest without tilting your head forward. Imagine that you are trying to make a double chin. Keep your eyes looking straight ahead; avoid looking down at your chest.
- Hold the position: Hold the chin tuck for 5-10 seconds while maintaining normal breathing. You should feel a stretch or release of tension in the back of your neck and upper back.
- Release: Slowly return your head to a neutral position. Repeat the exercise 5-10 times, focusing on the stretch and relaxation of the trapezius muscles.
Neck Extensions:
- Sit or stand up straight: Begin in a comfortable seated or standing position with your shoulders relaxed.
- Place your hands on your hips: Let your arms hang down at your sides or place your hands on your hips for stability.
- Tilt your head backward: Gently tilt your head backward, looking up toward the ceiling. Keep your chin level and avoid tilting your head to the sides. You should feel a stretch in the front of your neck.
- Hold the position: Hold the neck extension for 5-10 seconds while maintaining normal breathing. You should feel a gentle stretch in the front of your neck.
- Return to neutral: Slowly bring your head back to a neutral position, looking straight ahead. Repeat the exercise 5-10 times, focusing on the stretch and relaxation of the front of your neck.
Additional Tips:
- Perform these exercises slowly and gently to avoid straining your neck or upper back.
- If you experience pain or discomfort while doing these exercises, stop immediately and consult a healthcare professional.
- You can do these exercises multiple times a day if you have knots or tension in your traps. Regular stretching and mobility exercises can help prevent knots from forming in the first place.
- Maintain good posture throughout the day to reduce the likelihood of developing tension in the trapezius muscles.
- Remember to breathe naturally and relax your shoulders during these exercises.
Chin tucks and neck extensions are simple but effective ways to relieve tension in the trapezius muscles and promote better neck and upper back health. However, if you have chronic or severe neck or upper back pain, it’s important to consult with a healthcare professional for a proper diagnosis and treatment plan.
If you enjoyed these tips, please save this pin to your Pinterest Board.
Cat and Camel
The “cat and camel” exercise primarily targets the flexibility and mobility of the spine, particularly the lower back, but it can also help with overall upper body relaxation, which may indirectly relieve knots or tension in the trapezius muscles. Here’s how to perform the “cat and camel” exercise:
Cat and Camel Exercise:
- Starting Position:
- Begin on your hands and knees on a comfortable exercise mat or carpet. Your hands should be directly under your shoulders, and your knees should be under your hips.
- Ensure your spine is in a neutral position to start, with your back and neck in a straight line.
- Cat Pose (Flexion):
- Inhale as you arch your back upward, like a cat stretching. Push your spine toward the ceiling, tucking your chin toward your chest.
- Imagine pulling your belly button towards your spine to create a rounded shape in your back.
- Hold this position for a few seconds while taking a deep breath.
- Camel Pose (Extension):
- Exhale as you lower your back down and create an arch in your lower back, similar to the position of a camel’s hump.
- Lift your head and chest upward while looking forward, keeping your neck in line with your spine.
- Hold this position for a few seconds, again taking a deep breath.
- Repeat the Sequence:
- Transition between the cat and camel positions smoothly and continuously.
- Inhale as you move into the cat pose (flexion), and exhale as you move into the camel pose (extension).
- Repeat this sequence 10-15 times, moving slowly and deliberately.
Additional Tips:
- Focus on the movement of your spine during this exercise. It’s not about how high you can arch or round your back, but rather about gently mobilizing your spine through its full range of motion.
- Keep your core engaged throughout the exercise to support your lower back and maintain stability.
- Breathe deeply and rhythmically during the movements to enhance relaxation and stress relief.
- While the “cat and camel” exercise may help alleviate general tension in the upper body and promote relaxation, it may not directly target knots in the trapezius muscles. For specific relief from knots or tension in the traps, you may want to combine this exercise with other targeted stretches and self-massage techniques for the upper back and neck.
If you have persistent knots or discomfort in your trapezius muscles, it’s advisable to consult a healthcare professional or a physical therapist for a more comprehensive assessment and treatment plan.
Wall Angels
“
Wall angels,” also known as “wall slides,” are an effective exercise for relieving tension in the trapezius muscles, as well as improving posture and shoulder mobility. Here’s how to perform wall angels:
Wall Angels Exercise:
- Find a Wall:
- Stand with your back against a flat wall. Make sure your feet are about hip-width apart and your entire back is touching the wall. Your heels, buttocks, upper back, and head should all be in contact with the wall.
- Arm Position:
- Begin with your arms bent at a 90-degree angle, as if you were making the letter “W.” Your upper arms should be parallel to the ground, and your elbows should be at shoulder height.
- Start the Movement:
- Slowly slide your arms upward along the wall while keeping your back, head, and lower back in contact with the wall. Your goal is to reach your arms overhead without losing contact with the wall.
- Full Extension:
- As you continue to slide your arms up, straighten them completely overhead. Your palms should be facing forward, and your arms should be in line with your ears.
- Reverse the Movement:
- Begin to reverse the motion by bending your arms and sliding them back down the wall, returning to the starting “W” position.
- Repeat:
- Perform this sliding motion, or “angel” movement, 10-15 times. Focus on maintaining contact with the wall throughout the entire range of motion.
Additional Tips:
- Keep your core engaged during the exercise to support your lower back and maintain proper posture.
- Make sure your head is touching the wall throughout the movement. This encourages good neck and upper back alignment.
- Perform the exercise slowly and deliberately, emphasizing the quality of the movement over speed.
- Pay attention to any areas where you might feel tension or tightness, especially in the trapezius muscles. You can pause and gently work through these areas by making small, controlled movements.
- If you’re unable to maintain contact with the wall during the full range of motion, it’s okay to start with a smaller range of motion and gradually work toward the full “angel” position as your flexibility and mobility improve.
Wall angels are excellent for improving posture and shoulder mobility, and they can help alleviate tension in the trapezius muscles. However, for chronic or severe knots in the traps, it’s a good idea to combine this exercise with other targeted stretches, self-massage techniques, and, if necessary, consult a healthcare professional or physical therapist for further guidance and treatment.
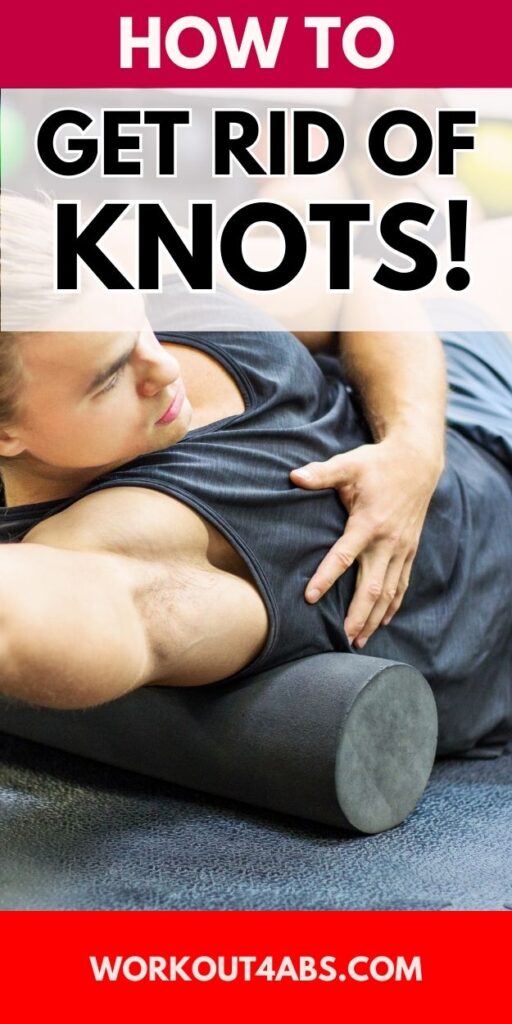
Lacrosse Ball Roll
Rolling on a lacrosse ball on your back is a self-myofascial release technique that can be highly effective in providing relief from knots or tension in the trapezius muscles and other areas of the upper back. This technique essentially acts as a self-massage to release trigger points and improve blood flow to the affected muscles. Here’s how to do it:
Materials Needed:
- A lacrosse ball or a similarly sized and firm massage ball.
- A mat or a comfortable surface to lie on.
Procedure:
- Preparation:
- Find a quiet and comfortable space where you can lie down. A yoga mat or exercise mat can provide some cushioning, but you can also use a carpeted floor or even lie on your bed.
- Positioning:
- Lie down on your back with your knees bent and your feet flat on the floor. This position helps stabilize your lower back.
- Place the Lacrosse Ball:
- Hold the lacrosse ball in your hand and place it on the area of your upper back where you feel knots or tension, typically around the trapezius muscles.
- Start with a specific spot that feels tender or tight.
- Apply Pressure:
- Gently press your body down onto the lacrosse ball, allowing it to sink into the muscle. You can use your body weight to control the pressure. Start with light to moderate pressure and adjust as needed; it should be uncomfortable but not painful.
- Rolling Motion:
- Begin to move the lacrosse ball in small, controlled movements. You can roll it up and down, side to side, or in circular motions, depending on your preference and the location of the knots.
- As you roll, try to relax your muscles and breathe deeply. Focus on areas where you feel the most tension, and spend more time on those spots.
- Gradual Release:
- Continue rolling for 1-2 minutes on each knot or area of tension. As you do so, you should start to feel the knots release and the muscle tension decrease.
- If you find a particularly sensitive area, you can hold the ball on that spot (trigger point) for about 20-30 seconds to encourage release.
- Repeat as Needed:
- Move the lacrosse ball to different areas of your upper back where you feel tension or knots. Repeat the rolling and pressure techniques as necessary.
- Finish with Stretching:
- After rolling, perform some gentle stretches for the neck and shoulders to further relax the muscles.
Tips:
- Maintain control over the pressure; don’t press so hard that it becomes painful.
- Avoid rolling directly over your spine or any bony prominences.
- If you have severe or persistent knots, consider seeking the advice of a healthcare professional or a licensed massage therapist for a more comprehensive evaluation and treatment plan.
Self-myofascial release with a lacrosse ball can be a valuable tool in relieving knots and tension in the trapezius muscles and other areas of the upper back. It’s essential to listen to your body and adjust the pressure and technique as needed to ensure safe and effective relief.
Foam Roller on Back
Using a foam roller on your back is a self-myofascial release technique that can help provide relief from knots or tension in the trapezius muscles and other areas of the upper back. This method uses the pressure and rolling motion of the foam roller to massage and release trigger points, improving blood flow and muscle flexibility. Here’s how to use a foam roller on your upper back:
Materials Needed:
- A foam roller (a cylindrical foam exercise tool).
- A mat or a comfortable surface to lie on.
Procedure:
- Preparation:
- Find a quiet and comfortable space where you can lie down. Lay a yoga mat or exercise mat on the floor for cushioning.
- Positioning:
- Lie down on your back with your knees bent and your feet flat on the floor. This position helps stabilize your lower back and prevents excessive arching.
- Place the Foam Roller:
- Position the foam roller horizontally on the mat, perpendicular to your spine, near the base of your shoulder blades. This is the starting position.
- Lift Your Hips:
- Lift your hips slightly off the ground and place your weight on the foam roller. You should feel a gentle pressure on your upper back.
- Roll Up and Down:
- Begin to roll the foam roller slowly up your upper back towards your neck, and then back down towards your mid-back. This rolling motion should be done in a controlled and deliberate manner.
- Focus on areas where you feel knots or tension, and spend more time on those spots. If you find a particularly sensitive area (trigger point), you can pause and hold the roller on that spot for about 20-30 seconds.
- Breathe and Relax:
- While rolling, try to relax your muscles as much as possible and breathe deeply. Relaxing helps the muscles release tension more effectively.
- Repeat as Needed:
- Move the foam roller to different areas of your upper back, addressing any knots or tight spots you encounter. Continue to roll and apply pressure as needed.
- Finish with Stretching:
- After using the foam roller, perform some gentle stretches for the neck, shoulders, and upper back to further promote relaxation.
Tips:
- Use your hands and feet to help control the amount of pressure you apply on the foam roller. If you want to increase the pressure, use your feet to lift your hips higher.
- Avoid rolling directly over your spine or any bony prominences.
- Start with a softer foam roller if you’re new to foam rolling, and gradually progress to a firmer one as your muscles become more accustomed to the pressure.
- If you have severe or persistent knots, consider seeking the advice of a healthcare professional or a licensed massage therapist for a more comprehensive evaluation and treatment plan.
Foam rolling can be an effective method for relieving knots and tension in the trapezius muscles and the upper back. It’s essential to perform the technique slowly and mindfully to ensure safe and effective relief.
Thoracic Outlet Syndrome Relief
Lying on a foam roller along the spine, also known as thoracic spine mobilization, can be beneficial for individuals with thoracic outlet syndrome (TOS). TOS is a condition characterized by the compression of nerves and blood vessels in the thoracic outlet, which is the space between the collarbone (clavicle) and the first rib. Symptoms of TOS can include pain, numbness, tingling, and weakness in the neck, shoulder, and arm. Thoracic spine mobilization using a foam roller can help alleviate some of these symptoms by promoting better posture, relieving muscle tension, and increasing mobility in the upper back and neck. Here’s how to perform this technique:
Materials Needed:
- A foam roller (a cylindrical foam exercise tool).
- A mat or a comfortable surface to lie on.
Procedure:
- Preparation:
- Find a quiet and comfortable space where you can lie down. Lay a yoga mat or exercise mat on the floor for cushioning.
- Positioning:
- Begin by sitting on the floor with your legs extended in front of you.
- Place the Foam Roller:
- Position the foam roller vertically along your spine, starting at the base of your ribcage and extending up to your neck. The foam roller should be parallel to your spine and provide support along its entire length.
- Lie Down:
- Slowly lie back onto the foam roller, allowing it to support your spine. Your head should rest on the foam roller, and your arms can be extended out to the sides or placed on your chest for support.
- Relax and Breathe:
- Take deep breaths and try to relax your body as much as possible. The foam roller should provide gentle pressure along your thoracic spine.
- Hold for a Few Minutes:
- Stay in this position for 2-5 minutes, allowing your upper back and neck muscles to release tension and gradually open up.
- Rolling Motion (Optional):
- If you feel comfortable and want to add some mobility to the exercise, you can gently rock side to side on the foam roller or make small rolling movements up and down the spine. Ensure that you maintain control and that the movement is slow and controlled.
- Exit the Position:
- When you’re ready to come out of the position, roll to one side and use your hands to assist you in sitting up.
Tips:
- Start with a softer foam roller if you’re new to foam rolling or have a particularly sensitive upper back or neck. Gradually progress to a firmer roller as you become more accustomed to the pressure.
- Avoid putting excessive pressure on your lower back or lumbar spine during this exercise. The foam roller should primarily support the thoracic spine.
- If you experience any pain or discomfort, stop the exercise and consult a healthcare professional.
Thoracic spine mobilization using a foam roller can help improve posture, reduce muscle tension, and enhance mobility in the upper back and neck. While it can provide relief for some individuals with thoracic outlet syndrome, it’s essential to consult with a healthcare provider for a comprehensive evaluation and treatment plan tailored to your specific condition.
If you enjoyed these tips, please save this pin to your Pinterest Board.
Home › Posture Exercises ›Upper Trap Knots