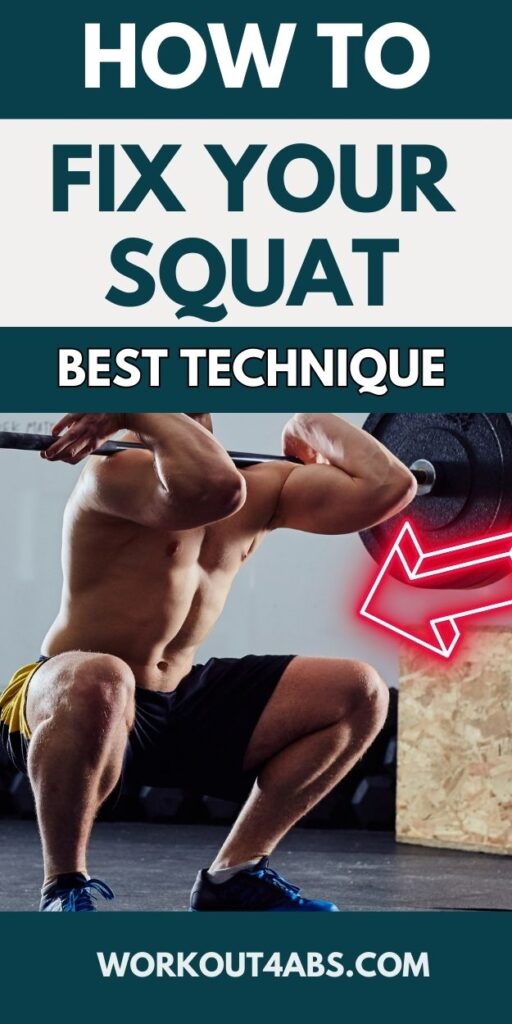
How to squat properly for mastering the art of the squat. This technique is essential for building strength and avoiding injury. In this comprehensive guide, we’ll break down the steps to a proper squat, from the initial barbell walkout, coordinating the simultaneous break at the knees and hips, the breath hold for stability, to executing a controlled descent.
How to Squat Properly – Form Fixes + Tips + Myths
If you enjoyed these tips, please save this pin to your Pinterest Board.
High Bar vs Low Bar Position
For back squats, the primary difference between the high bar and low bar positions lies in the placement of the barbell on your upper body and the resulting mechanics of the squat.
High Bar Squat:
- Bar Placement: In the high bar squat, the barbell rests on your upper trapezius muscles, typically around the base of your neck.
- Body Position: This position keeps your torso more upright during the squat.
- Center of Gravity: The bar’s position over the upper back means your center of gravity is relatively higher.
- Muscle Emphasis: High bar squats primarily engage the quadriceps (front thigh muscles) and to a lesser extent, the glutes and lower back.
- Technique: You’ll generally perform high bar squats with a more upright posture, which is similar to a front squat. This position may feel more comfortable for Olympic weightlifting or athletes who require an upright posture.
Low Bar Squat:
- Bar Placement: In the low bar squat, the barbell is placed lower on your back, typically resting on the rear deltoids (shoulder muscles) or slightly below them.
- Body Position: This position leans your torso forward more during the squat.
- Center of Gravity: The lower bar placement shifts your center of gravity downward and backward.
- Muscle Emphasis: Low bar squats place a greater emphasis on the posterior chain, including the glutes, hamstrings, and lower back. They also engage the quadriceps but to a lesser extent compared to high bar squats.
- Technique: You’ll perform low bar squats with a slightly more forward-leaning posture. This position is commonly favored by powerlifters for its ability to lift heavier weights due to the biomechanical advantages it offers.
Choosing between the high bar and low bar squat positions often depends on your specific goals and body mechanics. High bar squats may be preferred for building quadriceps strength and maintaining an upright posture, while low bar squats are favored for emphasizing the posterior chain and lifting heavier weights in powerlifting. Experiment with both positions to determine which suits your needs and feels most comfortable.
If you enjoyed these tips, please save this pin to your Pinterest Board.

Hand Position
The hand position and placement on the barbell during a back squat are critical factors that can significantly impact your stability, strength, and safety while performing the exercise. Whether your hands are wide or narrow on the barbell, it’s crucial to maintain proper shoulder blade retraction and back tightness to establish a strong foundation for lifting more weight. Here’s an explanation of hand placement and its relationship with shoulder blade engagement:
Hand Position:
- Wide Hand Position: In a wide hand position, your hands are placed farther apart on the barbell, typically outside shoulder width. This position allows for a broader base of support.
- Narrow Hand Position: In a narrow hand position, your hands are closer together on the barbell, typically inside shoulder width. This position may feel more comfortable for some lifters but offers a slightly narrower base of support.
Shoulder Blade Engagement and Back Tightness:
- Regardless of your chosen hand position, the key to a strong and safe barbell back squat is maintaining proper shoulder blade retraction and back tightness throughout the lift.
- Shoulder blade retraction involves pulling your shoulder blades back and down toward your spine, creating a stable foundation for the barbell to rest on.
- Back tightness is achieved by engaging the muscles of the upper back, including the rhomboids, traps, and rear deltoids, to create tension and stability in the upper body.
Why Shoulder Blade Engagement and Back Tightness Are Crucial:
- Stability: Engaging the shoulder blades and keeping the back tight provides a stable platform for the barbell, reducing the risk of it rolling or shifting during the squat.
- Spinal Support: It helps maintain a neutral spine, which is essential for spinal health and injury prevention.
- Strength: A tight upper back allows you to transfer force more efficiently from your lower body to the barbell, enabling you to lift more weight and perform the squat safely.
- Balance: Proper shoulder blade retraction and back tightness help distribute the load evenly across your upper back and shoulders, preventing undue stress on any one area.
In summary, while hand position on the barbell can vary based on personal comfort and preference, the consistency should be in maintaining strong shoulder blade engagement and back tightness. These factors are essential for squatting effectively, lifting more weight, and minimizing the risk of injury. Whether your hands are wide or narrow, focus on creating a solid foundation in your upper back to support your barbell back squat.
Foot Position and Foot Angle
The foot width and foot angle in the barbell back squat are crucial aspects of your setup that can significantly impact your squatting technique, stability, and muscle engagement. Here’s an explanation of each:
1. Foot Width:
- Foot width refers to the distance between your feet when performing a barbell back squat.
- The optimal foot width can vary depending on individual anatomy, flexibility, and squatting goals.
- A common starting point is to position your feet approximately shoulder-width apart. This allows for a balanced and stable base.
- However, some people may prefer a narrower or wider stance based on their comfort and mobility. Experiment to find the foot width that feels most natural and allows for good squat depth and form.
2. Foot Angle:
- Foot angle refers to the direction in which your toes point during a barbell back squat.
- The ideal foot angle can also vary among individuals, but two primary angles are often used:
a. Neutral or Slightly Outward: – Many people prefer to have their toes pointing slightly outward, typically at an angle of about 5 to 30 degrees. – This foot angle can help with hip mobility and prevent the knees from caving in during the squat. – A slight outward angle often feels more natural for most people and allows for smoother descent and ascent.
b. Straight Ahead: – Some individuals may opt for a more neutral foot angle with toes pointing directly forward. – This can be beneficial for targeting the quadriceps and may be preferred for powerlifting-style squats. – However, it can put more stress on hip mobility, so individuals with limited hip flexibility might find this stance less comfortable.
The key is to find a foot width and angle combination that allows you to maintain proper squat mechanics, such as keeping your knees in line with your toes, maintaining a neutral spine, and achieving sufficient depth without discomfort or strain. Remember that individual variations and preferences exist, so it’s essential to experiment and adapt your foot placement to what works best for you. Proper foot positioning can contribute to safe and effective barbell back squat performance and help prevent injuries.
Elbow Position
In the back squat, maintaining proper elbow position is crucial for maintaining stability, ensuring good posture, and effectively distributing the load on your upper body. The general principle is to keep the elbows in line with the torso throughout the movement. Here’s why and how to achieve this optimal elbow position:
Importance of Elbow Position:
- Stability and Balance:
- Keeping the elbows in line with the torso helps maintain stability and balance during the squat.
- Proper alignment ensures the load is distributed evenly across the upper back and shoulders.
- Maintaining Upright Torso:
- Elbows in line with the torso help keep the chest lifted and the upper body in an upright position.
- This upright posture is essential for a safe and effective squat, preventing excessive leaning forward or rounding of the back.
- Optimal Muscle Engagement:
- Proper elbow position promotes optimal engagement of the upper back muscles, including the traps and rhomboids.
- Engaged muscles assist in stabilizing the barbell on the back and help transfer force effectively from the lower body to the bar.
How to Achieve Proper Elbow Position:
- Set Your Grip:
- Grip the barbell with both hands, slightly wider than shoulder-width apart, based on your preferred grip (e.g., overhand, mixed grip).
- Ensure your grip allows you to position your elbows in line with your torso.
- Create Upper Back Tightness:
- Before unracking the barbell, retract your shoulder blades by pulling them back and down.
- Engage your upper back muscles to create tightness in the upper back, maintaining this tension throughout the squat.
- Position Your Elbows:
- As you lift the barbell off the rack, keep your elbows pointing downward and inline with your torso.
- Avoid letting your elbows flare out to the sides; instead, maintain a slightly angled position, pointing diagonally behind you.
- During the Squat:
- As you descend into the squat, maintain the alignment of your elbows with your torso.
- Avoid allowing the elbows to drop or excessively flare out, which can compromise form and stability.
By focusing on maintaining proper elbow position throughout the back squat, you’ll ensure a strong and stable upper body, efficient force transfer, and a safer, more effective squatting experience. Consistent practice and attention to form will reinforce this essential aspect of the back squat.
Breathe Hold During the Squat
Creating intra-abdominal pressure (IAP) during a barbell back squat is essential for maintaining spinal stability, protecting the lower back, and maximizing your lifting performance. Here’s how to create IAP effectively:
- Breathing Technique:
- Begin by taking a deep breath before you start your squat. Inhale deeply through your nose, filling your abdomen and chest with air.
- Focus on breathing into your diaphragm and expanding your abdominal area rather than raising your chest.
- Hold Your Breath:
- Once your lungs are filled, hold your breath. This is known as the Valsalva maneuver.
- Close your glottis (the space in your throat) to prevent the air from escaping. It should feel like you’re trying to exhale with a closed throat.
- Brace Your Core:
- While holding your breath, brace your core by contracting your abdominal muscles forcefully.
- Imagine someone is about to punch you in the stomach, and you need to tense up to protect yourself. This bracing action increases IAP.
- Maintain Pressure Throughout the Squat:
- Maintain this intra-abdominal pressure as you descend into the squat and rise back up.
- The pressure should create a stable column of support for your spine, protecting it from excessive flexion or extension.
- Release Pressure at the Top:
- After completing the squat repetition, exhale and release the pressure at the top of the movement when you’ve returned to a fully upright position.
- Re-Breathe for the Next Rep:
- Before starting the next repetition, repeat the breathing process by taking a deep breath, holding it, and bracing your core.
Creating IAP in this manner helps you maintain a rigid and stable torso throughout the squat, which is essential for spinal safety and efficient force transfer. It also helps you lift heavier weights and maintain proper form. However, it’s crucial to practice this technique and gradually increase the weight to ensure you can handle the increased pressure safely. Proper breathing and bracing are fundamental for any compound lift, like the barbell back squat.
Barbell Walk Out
The barbell walkout is an essential part of setting up for a barbell back squat when you’re preparing to lift the weight away from the squat rack. A proper walkout ensures you establish a stable and balanced position before starting your squat. Here’s how to perform a barbell walkout:
1. Rack Setup:
- Begin by setting up the barbell at the appropriate height on the squat rack. The bar should be positioned just below shoulder level when you stand in front of it.
2. Approach the Bar:
- Stand facing the barbell with your feet roughly hip-width apart.
- Approach the bar and position your body so that it’s centered under the bar.
3. Hand Placement:
- Reach up and grip the bar with both hands slightly wider than shoulder-width apart. Choose a grip that is comfortable for you, such as an overhand (pronated) or mixed grip.
4. Brace Your Core:
- Take a deep breath and brace your core by contracting your abdominal muscles. This will help create intra-abdominal pressure and stabilize your spine.
5. Lift the Bar:
- While maintaining an upright posture and keeping your core engaged, lift the bar off the squat rack’s supports by straightening your hips and knees.
- Take a small step back with one foot at a time to clear the rack, ensuring the barbell remains securely positioned on your upper back.
6. Set Your Feet:
- Position your feet in your desired squat stance. Your feet can be hip-width apart or slightly wider, depending on your comfort and mobility.
- Ensure your feet are evenly spaced and pointing slightly outward, typically at an angle of about 5 to 30 degrees.
7. Final Adjustments:
- Before initiating the squat, make any necessary adjustments to your foot placement and bar position on your upper back.
- Ensure that the barbell is resting comfortably and securely on your upper traps or rear deltoids.
- Double-check that your core is still braced, creating intra-abdominal pressure for spinal stability.
8. Take a Deep Breath:
- Before descending into the squat, take another deep breath and hold it to reinforce your core stability.
9. Perform the Squat:
- With your core braced and your body in a stable position, initiate the squat by bending your hips and knees simultaneously.
- Descend to your desired depth, maintaining proper form and keeping your elbows inline with your torso.
10. Return to the Rack:
- After completing your set of squats, carefully walk back to the squat rack.
- Once you are safely inside the rack, re-rack the barbell by carefully lifting it onto the supports.
The barbell walkout is a crucial part of the squat setup, ensuring that you are in the right position to perform the exercise safely and effectively. Practice this technique to develop consistency and confidence in your squatting routine.
Hip and Knee Bend
Breaking at the hips and knees simultaneously as you initiate the descent of the barbell back squat is a fundamental aspect of proper squat technique. This coordinated movement ensures that you maintain balance and engage the right muscles throughout the squat. Here’s how to perform this movement:
1. Setup:
- Begin by setting up for the barbell back squat, including the bar placement, hand grip, and body positioning under the barbell.
2. Take a Deep Breath and Brace:
- Before starting the descent, take a deep breath to brace your core. This action creates intra-abdominal pressure and stabilizes your spine.
3. Look Forward:
- Keep your head in a neutral position, looking forward or slightly upward. Avoid looking down at the ground, as it can compromise your posture.
4. Feet Position:
- Ensure that your feet are shoulder-width apart or slightly wider, with your toes pointing slightly outward, typically at an angle of about 5 to 30 degrees. Your feet should be in a comfortable and balanced position.
5. Initiate the Descent:
- Begin the squat by simultaneously breaking at the hips and knees.
- To do this, push your hips backward (as if sitting in a chair) while bending your knees. It’s crucial to initiate both movements at the same time.
- Focus on keeping your chest upright, and your back should maintain a neutral, slightly arched position.
6. Maintain an Upright Torso:
- As you descend, ensure that your torso remains as upright as possible. Avoid excessive leaning forward or rounding of the back.
7. Go to Your Desired Depth:
- Continue descending until you reach your desired squat depth. This can vary from person to person based on flexibility, mobility, and training goals.
- In most cases, the goal is to descend until your thighs are at least parallel to the ground, or you achieve a full range of motion that feels comfortable and safe.
8. Maintain Control:
- Throughout the descent, focus on maintaining control and balance. Don’t rush the movement; go at a pace that allows you to control the weight.
9. Pause and Reverse:
- At the bottom of your squat or your desired depth, briefly pause while maintaining tension in your muscles.
- To reverse the movement, initiate the ascent by driving through your heels and straightening your hips and knees simultaneously.
- Continue to brace your core and keep your torso upright as you rise.
10. Complete the Repetition:
- Stand up fully to complete one repetition.
- If you’re performing multiple reps, repeat the descent and ascent for the desired number of repetitions.
11. Breathe:
- At the top of the squat, exhale and take another breath before starting the next repetition.
Breaking at the hips and knees simultaneously ensures that you distribute the load evenly and engage the appropriate muscles throughout the squat, promoting balance, stability, and proper form. Practicing this coordinated movement is key to performing safe and effective barbell back squats.
If you enjoyed these tips, please save this pin to your Pinterest Board.
Home › Workout for Athletes ›How to Squat Properly